Friday, November 7, 2014

The Optus experience - Part 1: Research

I've been looking into the Optus Prepaid Daily" mobile plan. As a very light user, this plan, with a 6 months expiry on credit (as opposed to 30 days with most other plans) and overall reasonable rates, seems to be the right product for me.

Navigating around the Optus website is mostly straight forward; you'll find the product you're after fairly quickly. The basic information regarding voice calls, messaging, and data use within Australia is clearly spelled out. Other items, such as international rates, are listed "somewhere else".

International call rates are easy enough to find. International messaging (SMS / MMS), however, is a different story. No price, no hint as where to find it, not even a link along the lines of "click here for more prices".

With roaming, it's a similar story. It starts out promising enough, with a "see our prepaid roaming rates" link on the product page taking you directly to the, well, roaming page. That's as straight forward as it can be, I give you that (ok, listing the link under the heading Low roaming rates constitutes a blatant lie, but that's a different story).

On the roaming page, you pick the relevant country, and a pop-up window gives you all the rates – well, sort of. The price for MMS to AU number is listed as Standard national MMS rate for your plan. Huh? Under the prepaid plan in question, I get unlimited (national) MMS (and SMS) messages once the daily $ 1.00 has been triggered. Does that mean I can send unlimited MMS to Australian numbers for $ 1.00 per day while I'm overseas? Considering that SMS to AU number is listed at $ 0.50 per message, I find that highly unlikely.

At this stage, I naively decide to give the Optus live chat feature that's so heavily promoted thruout the site a go. Blake, the friendly Optus Sales Consultant, responds quickly, but it's all downhill from there (I should have been warned when he introduced himself as a "consultant"). I put the question regarding SMS / MMS to international numbers to him, and he says he'll be "right with me". What follows are a series of "Thank you for waiting. I'll be right with you" messages (presumably automated), and then … Blake is gone! Disconnected.

Back on the product site, at the very bottom, is the infamous small print. Well, some of it. And among that small print, a link to the Critical Information Summary" (CIS) indicates that all might not be lost after all. The link takes you to the CIS library, rather than to the document that actually applies to the product, and you'll have to find your own way to the document (PDF) that applies to the product of your choice.

Once you have found the relevant CIS, you are rewarded with most of the information you've been looking for. It's all listed right there; non-standard call rates (directory, video calls, premium messages, etc), and International Messaging rates.

The CIS seems to be a pretty comprehensive source of information. It's mind-boggling that it doesn't occur to an Optus sales rep to at least look it up and see if it might answer the questions of the customer they're "helping".

On a side note, the CIS also states that while your credit on the Prepaid Daily plan expires after 6 months, you must recharge at least 30 days before expiry in order to keep the service active. That's not mentioned anywhere on the shiny product page, where the (supposedly) low rates and the long expiration period are advertised. Sneaky bastards!

Despite all this, I decide to go ahead. Read about actually signing up here.

Wednesday, October 29, 2014

Taking photos in Parramatta

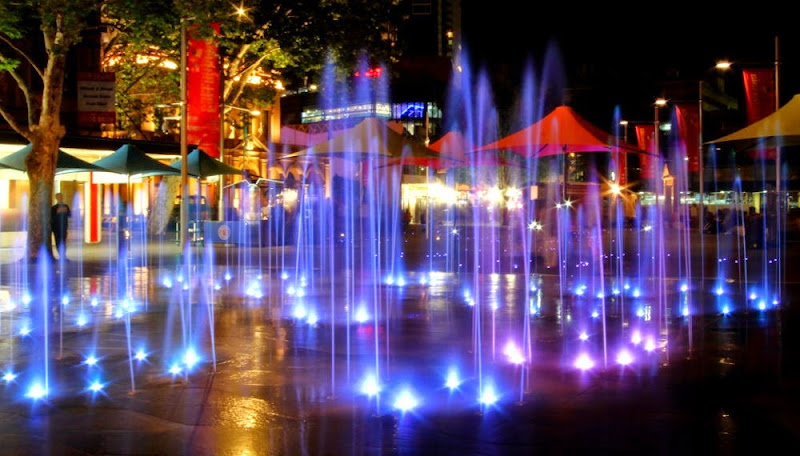
Just a heads up to those who consider taking a few photos of the fancy water feature on Parramatta's all-new Centenary Square (aka Church Street Mall):

If there's just one kid, fully dressed, frolicking among the water fountains (say, to cool off on a hot day), some over-protective asshole will call the cops, the boys in blue will come down on you like a ton of bricks, they will take your details, and they will bully you into deleting all the photos you have taken.

To keep all the hysteric, super-PC, hyper-concerned douchebags happy, here's a nighttime photo of said water feature. No kids anywhere, and a shutter speed of 2 minutes has made sure no moving objects, such as persons, remain visible.

Centenary Square

Monday, August 25, 2014

Rhine Falls

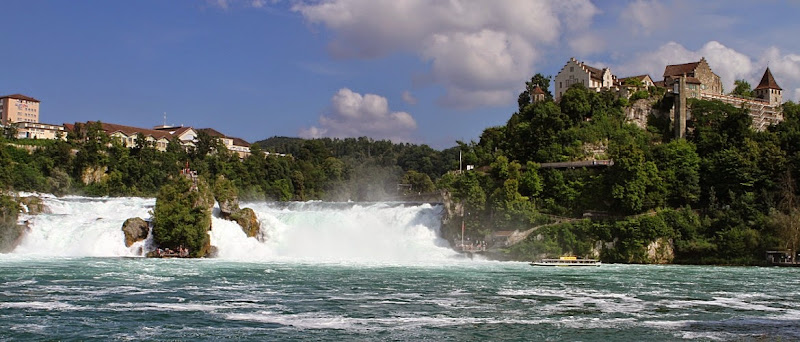
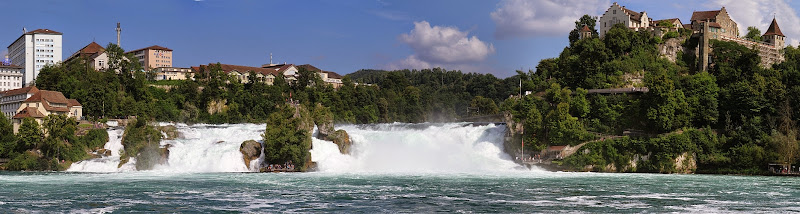
At just 23 meters (75 feet), the Rhine Falls are by no means the highest waterfalls. The Swiss Alps alone feature numerous falls that are much higher and, for that matter, probably look more impressive. Still, thanks to a flow rate ranging from 250,000 liters / second (winter) to 600,000 liters / second (summer), these falls are regarded as the "biggest" in Europe.

And that makes them worthy of a couple of photos:

Rhine Falls

Rhine Falls
HDR image by Luminance

Rhine Falls
Panorama image by Hugin

For visitor information, please check out the Rhine Falls official website.

Tuesday, July 1, 2014

Parramatta Winterlight

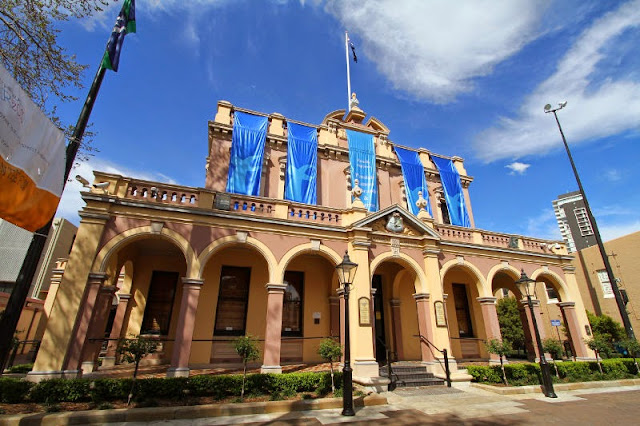
Once again, Parramatta is putting on the Winterlight Festival. Due to extensive construction work currently in progress in Church Street Mall, the event has been moved to Price Albert Park, and therefore has to do without the impressive backdrop of the illuminated Town Hall building (check out photos from last year here).

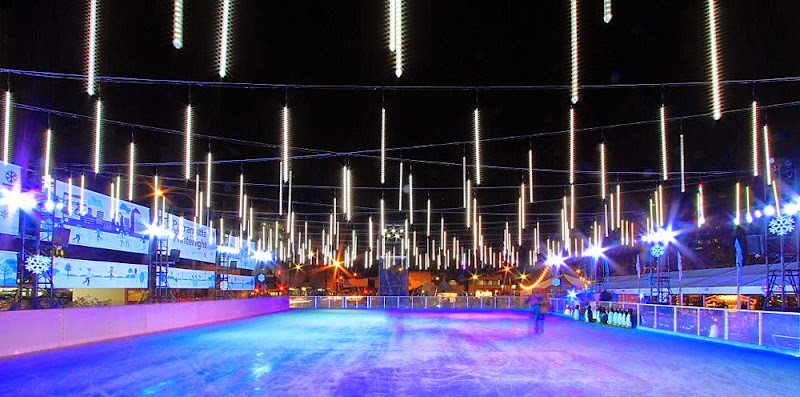
Still, the light installation above the ice rink is quite impressive:
Ice rink

There's also a winter bar, a couple (well, three) food stalls, and a giant snow ball for the kids to climb inside. Apart from the ice rink, the event mainly features activities and workshops for kids.

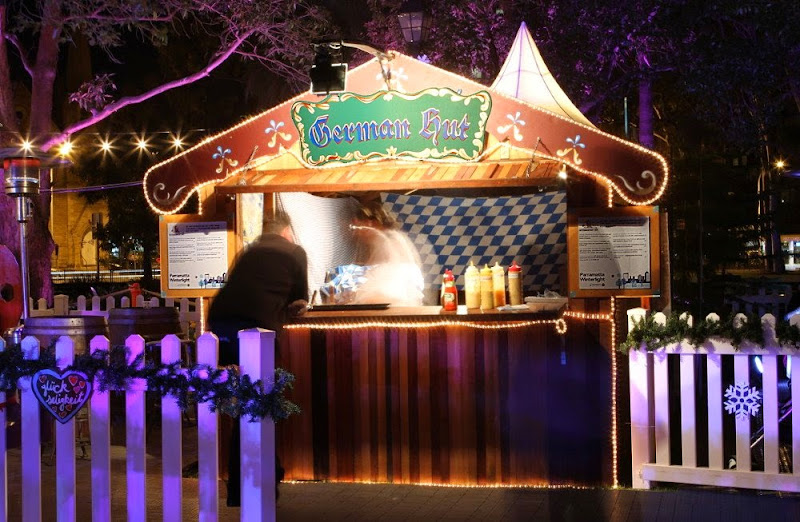
Warm lights around the food stalls add to the cozy atmosphere
Winterlight 2014

At the German hut, you can get some authentic bratwurst for a mere $ 8.
Winterlight 2014

Another food stall
Winterlight 2014


Sunday, June 22, 2014

Bob's Barbershop

Bob's sign


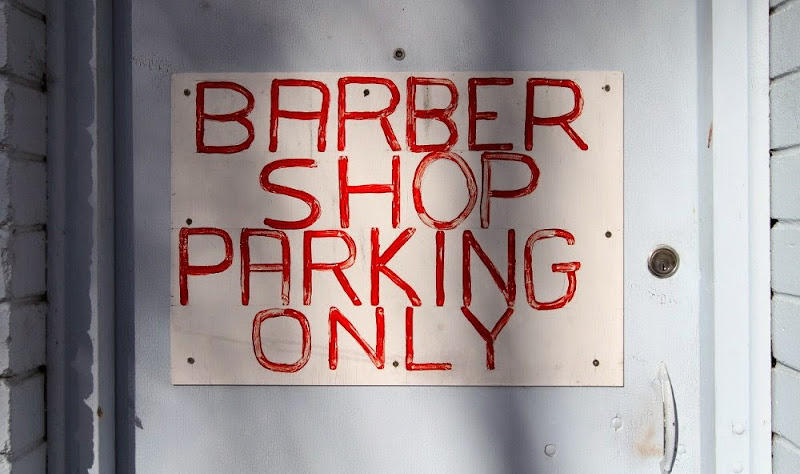
Barbershop parking only

Bob is what you might call an old school barber. He has been in the business for 52 years, starting as an apprentice, then getting his license (back then, you needed one), before taking over the business and buying all the equipment for the grand sum of $ 40.

There's no big menu of options to choose from; Bob's range of services consists of precisely 2 (two) products: Haircut and beard trim. And you won't be charged extra to have your hair cut by the "Senior Art Director"; once you're sitting in that single, 100-year-old barber chair, it is always Bob The Barber who gets to work, because, well, there is just him. And when he's done, that antique cash register will take your money (the whole $ 14.50) even during a power blackout.

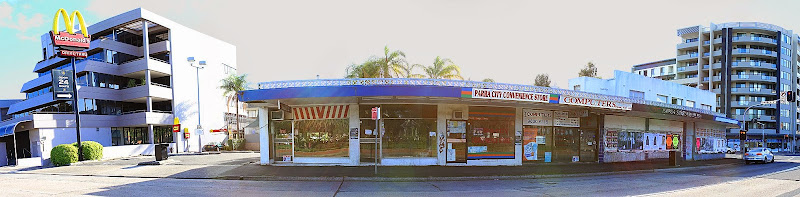
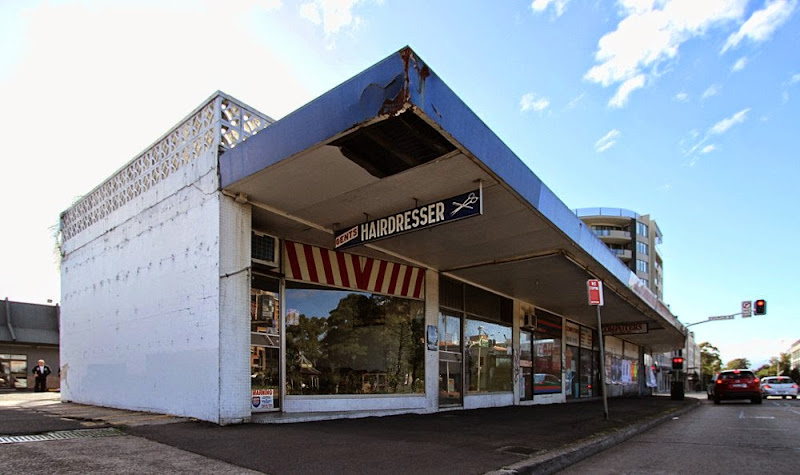
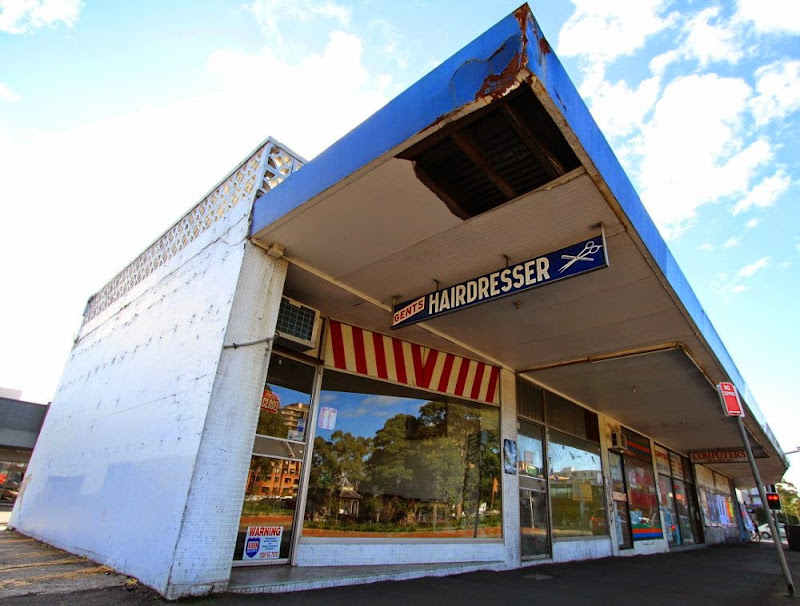
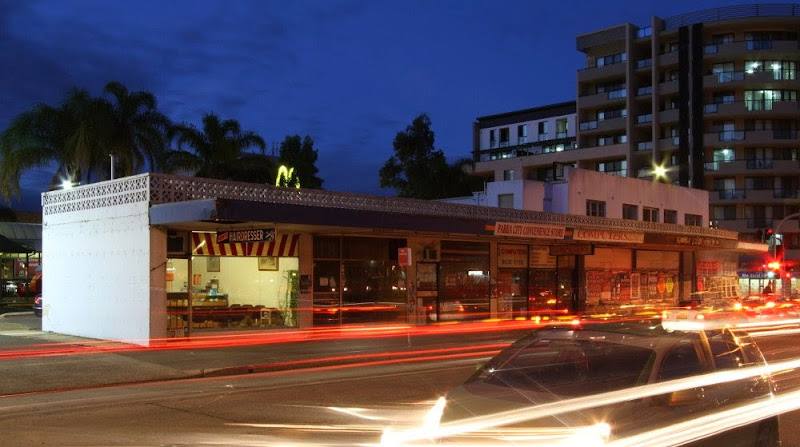
In 1980, Bob moved his business in Parramatta from Church Street to Victoria Road, opposite Prince Alfred Park. There, he has been the last shop still operating for at least 5 years now.
Bob's barbershop


At the end of June, Bob will close his door for the last time; the block of shops is due to be demolished so that McDonalds, who owns the site and the building, can extend their car park.

This development has brought Bob to the attention of the local newspaper, and even the TV news found room for a brief segment on this classic, local business.

Bob's barbershop

Fortunately, things have changed slightly since these news items were produced; as it turns out, Bob is not retiring, at least not completely. Instead, Bob is moving his business to 321 Concord Road, Concord West, where he will set up shop in / near his wife's antiques store.

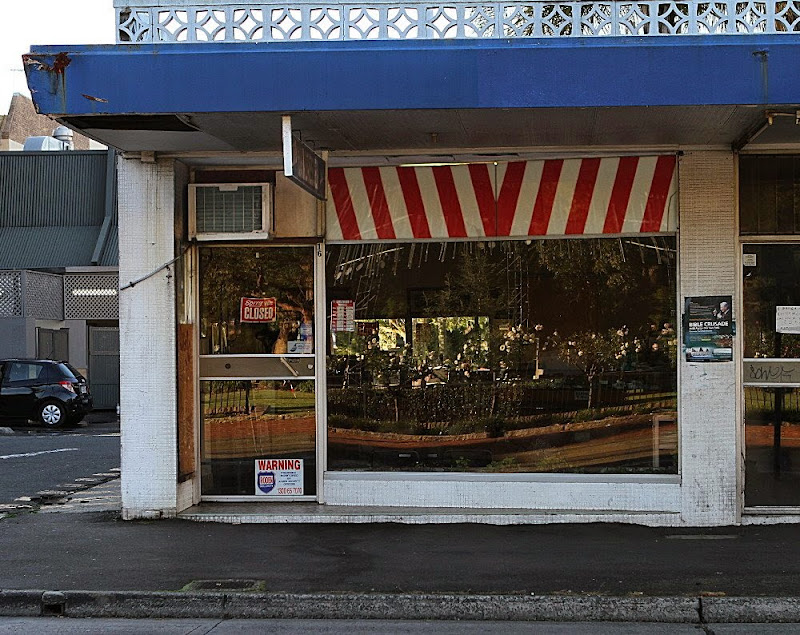
Meanwhile, I've decided to immortalize Bob's old place with a couple of photos before the bulldozers show up:

Bob's barbershop

Bob's barbershop

Bob's barbershop

Bob's barbershop

Bob's barbershop

Wednesday, May 7, 2014

Fixing wide-angle distortions with Hugin

Note: Hugin is a free cross-platform image processing tool, so this may be of interest to you even if you're using Windows or Mac.

Hugin is best known as a great tool to create panorama images from multiple photos; after all, the full title of the software product is Hugin – Panorama photo stitcher.

Another, not so widely known use of the same application is correcting distortions of wide-angle photos. When shooting with a wide-angle lens, you invariably end up with vertical lines leaning back, leaning to the side, or even "falling in" on the observer. While this keystone effect can enhance the impact of an photograph and is sometimes consciously included in the composition of an image for artistic effect, it often simply distracts the viewer, when you simply want to show a building or a city street "as is" and are using a wide-angle lens purely for practical purposes.

There's an extensive tutorial on the subject on the Hugin website, on which I've based my tests and the following notes.

The process of correcting those "falling" vertical lines essentially includes 2 basic steps:
1) Define lines that are supposed to be perpendicular
2) Distort the image so that these defined lines actually become perpendicular

Let's do this with this image:
Original wide angle photo

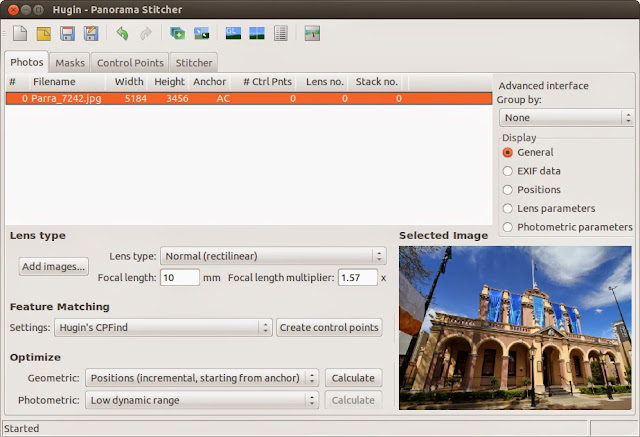
1) Load the image into Hugin, just as you would load any sequence of photos to create a panorama image.
Add image

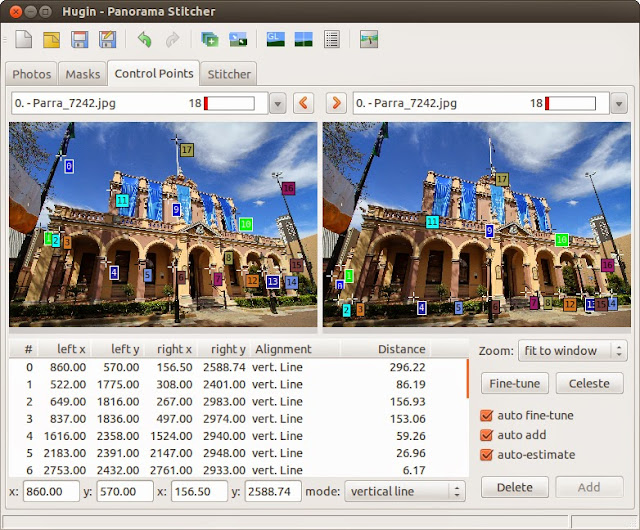
2) Set the control points. This is where you spend most of your time, this is the step that takes some real, manual work.

Make sure that Auto add is set. To start with, make sure Zoom is set to fit to window (you may need to temporarily change this to 100 % in order to get the exact positioning of some control points perfectly right).

To set the control points, pick a vertical feature in the left copy of the image and set a control point at one end. Then, set the corresponding control point at the other end of that vertical feature in the right copy of the image.

Ideally, you define your vertical features spread over the whole image, from left to right, and both in the top and the bottom section. This will allow Hugin to correctly calculate the correct distortion for the whole image; if you only define vertical lines in the left half of the image, Hugin has no way of knowing that there are also vertical lines in the right half, leaning in a different direction.
Set control points

3) Click the Optimize button
Optimize

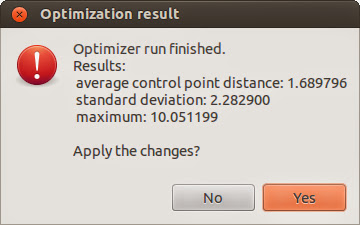
This will, well, optimize your control points. When done, apply the result of the optimization process:
Optimize completed

4) Open the Fast preview window:
Open Quick Preview

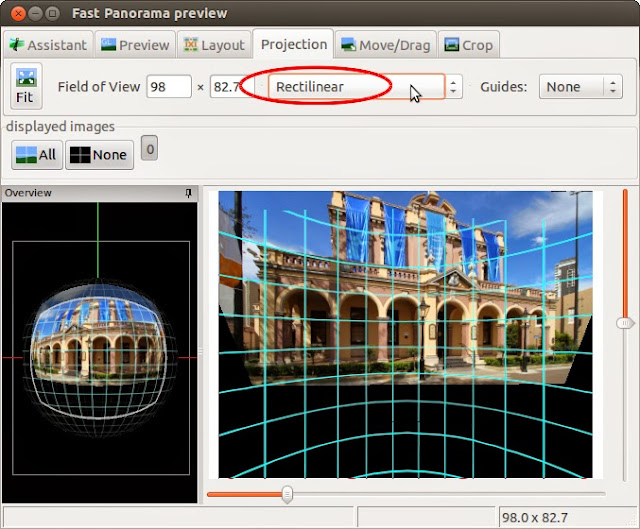
5) In the Projection tab, set projection type to Rectilinear.
Projection

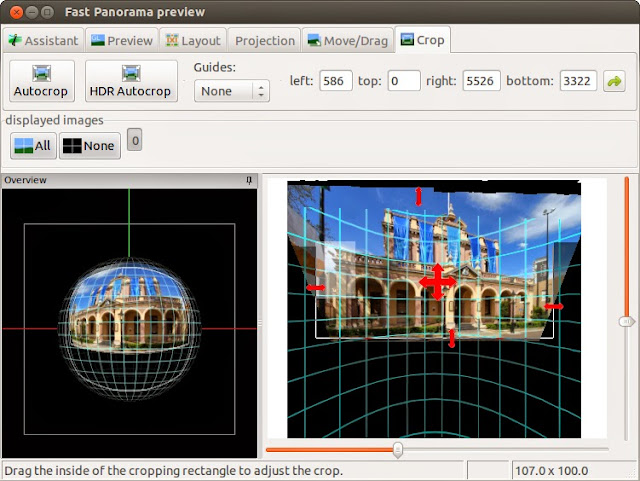
6) In the Crop tab, drag the boundaries to adjust the crop area.
Crop

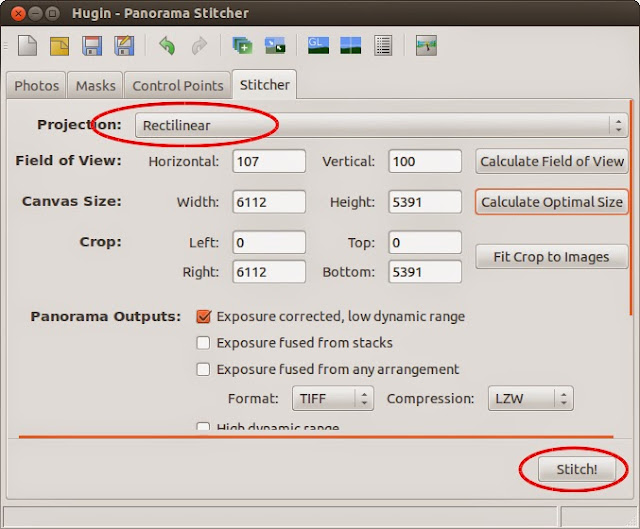
7) Create the corrected image. Since Hugin's primary function is to stitch multiple photos together to create panorama images, the final step of the process is called Stitch even though with only 1 image, you don't actually have anything to stitch together.

With that in mind, switch to the Stitch tab, make sure that Projection is set to Rectilinear, and click the Stitch button to let Hugin do its magic.
Stitcher

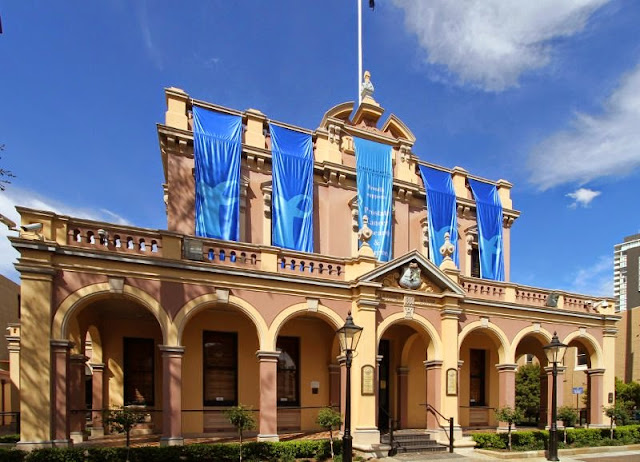
There you have it; one wide-angle picture with perfectly perpendicular vertical lines:
Modified by Hugin

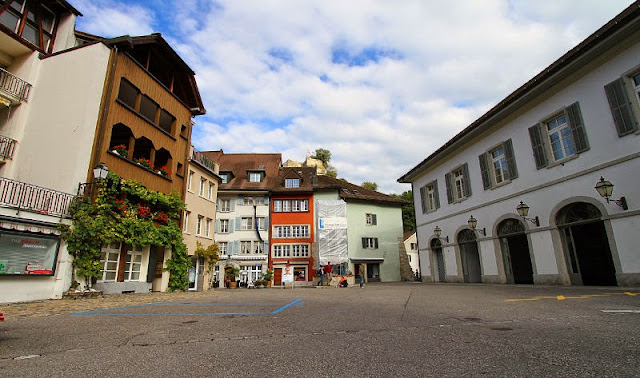
Below are some more examples;

Original wide angle photo Modified by Hugin

Original wide angle photo Modified by Hugin

Original wide angle photo Modified by Hugin

Original wide angle photo Modified by Hugin

Original wide angle photo
Modified by Hugin

Monday, May 5, 2014

Video editing with Ubuntu

AVI Demux video editor
Avidemux is a free video editor designed for simple cutting, filtering and encoding tasks. The user interface doesn't exactly make this the ideal tool for complex editing (for instance, there's no "timeline" to arrange your clips), it does provide a good range of filters, resizing options, etc, it allows frame-accurate navigation thru your video, and individual frames can be saved as *.jpg images.

Most importantly, however, Avidemux makes it easy to create time-lapse videos from individual photos. As long as your image files are named sequencially (e. g. image0001.jpg, image0002.jpg, image0003.jpg, …), you simply drop the first one into Avidemux, and the software uses all subsequent image files in that folder to generate the video file.

Installation
Via Synaptic Package manager

Openshot video editor
Openshot provides plenty of options and flexibility even for relatively complex video editing tasks, including speed changes (something I haven't found in too many other free video editing tools).

Installation
sudo add-apt-repository ppa:openshot.developers/ppa
sudo apt-get update
sudo apt-get install openshot openshot-doc

Saturday, May 3, 2014

Photo processing with Ubuntu

Image manipulation with GIMP
Many would describe GIMP as the Open Source answer to Photoshop. While it may not include every last obscure feature of Photoshop, I found that it provides pretty much everything I need for my basic amateurish everyday photo processing.

Installation
Note Despite claims to the contrary, neither the installation instructions from the GIMP homepage nor the package retrieved by Synaptic Package Manager installed the latest version (2.8) on my system. Some research revealed that to actually install version 2.8, it needed to be done from a third party PPA, which first needs to be added to your system:

sudo add-apt-repository ppa:otto-kesselgulasch/gimp
sudo apt-get update
sudo apt-get install gimp

Batch photo processing
Phatch allows the bulk manipulation of images, modifying the actual photos as well as editing meta data (Click here for the full list of actions)

Phatch also comes with Phatch Image Inspector, which allows you to easily view all the EXIF tags of one or more image files.

Installation
Via Synaptic package manager

Hugin Panorama stitcher
Just what the title says, Hugin lets you stitch together a number of individual photos to create one big panorama picture. The software can also handle multiple rows of images, and it can be used on single images to correct falling lines on wide angle photos ("Keystoning effect").

Installation
sudo add-apt-repository ppa:hugin/hugin-builds
sudo apt-get update
sudo apt-get install hugin enblend panini

Luminance HDR
Luminance HDR lets you process a series of photos to generate a High Dynamic Rrange image.

Installation
1) Download *.deb file from http://www.ubuntuupdates.org/package/getdeb_apps/precise/apps/getdeb/luminance
2) Open downloaded *.deb file in GDebi Package Installer

Friday, May 2, 2014

Multimedia applications for Ubuntu

Media player
The VLC player is one of the most reliable and most versatile media players available.

Installation
sudo apt-get update
sudo apt-get install vlc browser-plugin-vlc

CD Ripper
Asunder is a graphical Audio CD ripper and encoder. It can be used to save tracks from Audio CDs.

Installation
Via Synaptic Package Manager

Note for the public record: Columbo does not condone "illegal" copying of copyright-protected content, regardless of how outdated the laws on intellectual property, how unfair any "fair use" policy stated in those laws, or how inadequate legal access to your favorite music and other audio content might be in your country.

Audio editor
Audacity is a free, open source, cross-platform software for recording and editing sounds.

Installation
Via Synaptic Package Manager

Thursday, May 1, 2014

Ubuntu online / communication tools

A couple of online / communication related tools for Ubuntu.

Note: In addition to Mozilla Firefox which comes with Ubuntu, most other popular web browsers are also available for Ubuntu. I won't go thru the details of installing the various browsers, as they can easily be found and set up. When in doubt, I recommend starting here.
Email
If you're unhappy with Thunderbird, Evolution may be the alternative for you.

Installation
Via Synaptic Package Manager

Skype
Skype client for Ubuntu

Installation, as per this site

On Ubuntu 32bit:
wget -O skype.deb http://download.skype.com/linux/skype-ubuntu_4.0.0.8-1_i386.deb
sudo apt-get install libxss1
sudo dpkg -i skype.deb
sudo apt-get -f install && rm skype.deb

On Ubuntu 64bit:
wget -O skype.deb http://download.skype.com/linux/skype-ubuntu_4.0.0.8-1_amd64.deb
sudo apt-get install libxss1 lib32stdc++6 lib32asound2 ia32-libs libc6-i386 lib32gcc1
sudo dpkg -i skype.deb
sudo apt-get -f install && rm skype.deb

Deluge bit torrent client
Deluge is an easy to use bit-torrent client.

Installation
Via Synaptic Package Manager
or
sudo apt-get update
sudo apt-get install deluge

Note for the public record: Columbo does not condone "illegal" downloading of copyright-protected content, regardless of how outdated the laws on intellectual property, how unfair any "fair use" policy stated in those laws, or how inadequate legal access to your favorite music, TV shows, and movies might be in your country.